How to create a Quiz
After you login, click on the button "Create a Quiz".
Review the Settings:
First set a title and optionally add the quiz to a category.
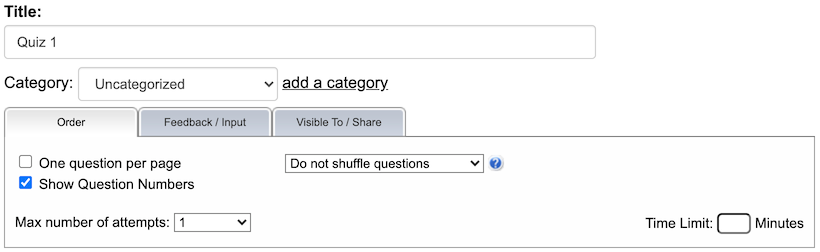
Tab "Order":
- One question per page: By default all questions are shown on the same page.
- Randomize questions: If you want to prevent your students from cheating this might be helpful.
- Max number of attempts: You can change this to "Unlimited".
- Time Limit: Set the time limit in minutes (for example 10). The student will see a countdown in the upper-right corner.
Tab "Feedback / Input":
- Feedback: Displays if the answer was correct after the student clicked the "Check"-button.
- Display the correct answers. If number of attempts is unlimited, the student will have the option to click a 'Show me the answers'-button.
If number of attempts is limited, the answers will display after no more attempts remain (if this option was checked).
- Case insensitive: Is checked by default, but if case is important (for example German nouns have to start with upper case), then uncheck this.
- Special Chars: See How do I add special chars?
Tab "Visible To":
You can choose if you want to share your quiz with everyone or if you want your students to login. See also Help on Sharing.
Add Questions:
Choose which type of quiz question you want to create.

The textbox and options will change according to the selection you made.
You have the following options:
- Blank Boxes & Dropdowns
- Generated Dropdowns
- Drag & Drop / Matching
- Find & Highlight (word search)
- Multiple Choice (one answer correct)
- Checkboxes (several answers correct)
- Essay (open-ended question)
- Description
When you are finished creating the first question, you can add another question by first choosing the type and then clicking on the button "Add a question". You can delete questions by clicking on the red cross.
Once you've added all your questions, click on "Show Quiz".
For more information about sharing a quiz, inserting multimedia, etc., please visit our help center.
Quizzes created by some of our Users


